
Another post starts with you beautiful people! Thanks for the great response to my last post where we successfully exported a custom-trained YOLOv7 model to ONNX format. In this post, we are going to move one step further to achieve high-performance inference using NVIDIA TensorRT. We will learn how can we export our YOLOv7 ONNX model to a TensorRT format.
NVIDIA TensorRT is an SDK for high-performance deep learning inference, includes a deep learning inference optimizer and runtime that delivers low latency and high throughput for inference applications. This file format is widely used in case you need to deploy your model into edge devices but with high inference speed. So knowledge of exporting your YOLOv7 model to TensorRT format is very beneficial learning.
Please note the exportation of the model is environmentally sensitive. It is recommended to use the same environment where you have trained the original YOLOv7 model. For this post as well I am using the same Google Colab environment which I used for YOLOv7 training as well as for exporting to ONNX. As a first step, we will install the required dependencies as below-

Once the above-required libraries are installed successfully, as a second step we will download the original YOLOv7 code repo for exporting our custom trained YOLOv7 model to ONNX format. Please skip this step if you have already exported it using my last post.

Let's export the YOLOv7 weight file to ONNX format using the below command -

In the above command, replace the .pt file with your own YOLOv7 file and remove the zero after --device argument if you don't have GPU. Once successfully finished, this command will save a .onnx format file in the same location where your .pt file is. Now as a third step we will clone another code repo for TensorRT export as below-

After successfully cloning the repo, as a fourth step, we will use its export.py file to convert our ONNX file to TensorRT format as below-

Here again, replace the .onnx file with your own file and rename .trt file name as per your wish, the final exported file will be saved with that name. Once the above command runs successfully, you will see the following output at the end of the console-

So our onnx to trt exportation is done successfully ✌. Next as the fifth and last step, we need an inference script to load this .trt file and test it on a test image. Let's understand the inference script with code snippets-

First, we have imported the required library for the inference. Next, we will write a class with a few necessary functions. Inside this class, Our first function is for loading and initializing the TensorRT engine as below-

Our next four functions are for running the inference, transforming the input image into the required format, detecting the target object with confidence scores, printing the frame per second, and the bounding box coordinates as below-


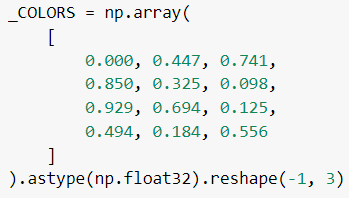
Next, we will create a list of colors for use in the bounding box. A sample list will be looked like as below-

Now we are ready to make an inference. Let's test an image with our TensorRT model-

Here in the first line pass your .trt file as engine_path and provide your test image in the inference() function. Next, I used matplotlib library to visualize the processed image and it looks like the below-


It looks perfect👌. I have got the result with 39.9 FPS which is very fast 💪 considering my original YOLOv7 custom model was based on its biggest size pre-trained weight which performance on MS COCO dataset was as below-

So if you train your dataset with its smallest version and then convert it to TensorRT, you may get 100+ FPS. Sounds interesting😮 Then why are you waiting? Start training your own YOLOv7 model, export it to the TensorRT engine, and compare the inference speed in CPU/GPU-based devices. Like always, you can find this post's colab notebook here. That's it for today guys. In my next post I will again share something useful till then 👉 Go chase your dreams, have an awesome day, make every second count, and see you later in my next post😇
Unlock the power of Python with our development services. From web applications to machine learning algorithms, our Python experts offer customized solutions for businesses. Get efficient and scalable applications, secure coding practices, and robust testing. Elevate your business with our Python Development Services
ReplyDeleteEmbark on a transformative journey into the realm of data science with APTRON's comprehensive Data Science Training in Gurgaon. In an era where data is hailed as the new currency, mastering the intricacies of data science is imperative for career advancement.
ReplyDelete