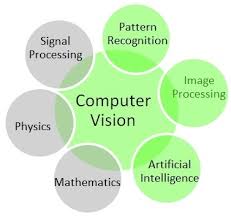
Another post starts with you beautiful people! Today we are going to enter into the Computer Vision (CV) field with this first post. With this and further coming posts, we will learn how to use Deep Learning for CV. We will cover following three key concepts with Python code in this post-
1. What is CV?
2. How to load and manipulate image using Keras?
3. How to scale your image using Keras?
Let's starts our learning-
1. What is CV?
Computer Vision or CV is a sub-field of Machine Learning and Artificial Intelligence, focused on the problem of helping computers to see. The goal of CV is to understand the content of digital images. CV has a wide variety of tasks-
- Object Classification
- Object Identification
- Object Verification
- Object Detection
- Object Segmentation
- Object Recognition
2. How to load and manipulate image using Keras?
A. Loading an image using Keras api is very easy. Keras provides load_img() function for loading an image. Before moving further make sure you have install keras. If not then run following command in Anaconda Prompt: conda install keras. The below Python code snippet demonstrates how to use this function-

In above output shell we can see my uploaded image format, it's mode and size. The image will not open in our notebook. It will be displayed using default application. In my case it was displayed by Photos app-

B. Manipulating an image is an integral part in deep learning and it starts with converting the image into numpy array format. Keras api provided img_to_array() and array_to_img() functions for this manipulation. Let's see how can we use both these two functions-

In above output cell, the uploaded image is converted into numpy array in float data type. The pixel values are converted into the format of (Height, Width, Channels). Finally the image is converted back to original PIL format.
C. Saving an image using Keras api is also easy. It provides save_img() function for this task. Following example will demonstrate how to load an image in grayscale format, converts it to numpy array and then save it to a new file name-


In above output, you can see our loaded image is converted into grayscale format and in numpy array. We have also saved and uploaded the new grayscale image.
3. How to scale your image using Keras?
Deep Learning models accept input images in scaled form. So we must scale our input images before training and evaluation of our deep learning model. Keras provides ImageDataGenerator class and API for just-in-time image scaling. To understand how to use this class and API, we will work on the same MNIST digit dataset which we have seen earliar in this post. For a quick revision the MNIST dataset, is an image classification problem comprised of 70,000 images of handwritten digits. The goal of the problem is to classify a given image of a handwritten digit as an integer from 0 to 9. So it is a multiclass image classification problem.
A. Load the dataset using keras

From above output we can see that there are 60000 images in training dataset and 10000 images in testing dataset. All images are 28 x 28 pixels. Pixel values are in between 0 to 255 and mean/std deviation of datasets are similar.
B. Scale the pixels using ImageDataGenerator
ImageDataGenerator class has three main scaling methods: Pixel Normalization, Pixel Centering, Pixel Standardization. Pixel Normalization technique scales pixel value to the range 0-1. Pixel Centering technique scales pixel values to have a zero mean. Pixel Standardization technique scales pixel values to have a zero mean and unit variance. Let's learn how to use each technique one by one-
1. Pixel Normalization: This can be achieved by setting the rescale argument to a ratio by which each pixel can be multiplied to achieve the desired range. In our case it would be 1.0/255.0.

In above output cell we can see that minimum and maximum pixels of training and testing datasets- 0 and 255. Since MNIST dataset has only black and white images, it has only one channel. If you are applying this to color images then minimum and maximum values will be calculated across all channels. In this example the ImageDataGenerator does not need to be fit on the training dataset as there is nothing that needs to be calculated, we have provided the scale factor directly.
2. Pixel Centering: In this technique we calculate the mean pixel value across the entire training dataset, then subtract it from each image.

In above output cell you are seeing the mean pixel values of training and test datasets. The ImageDataGenerator is fit on the training dataset and we have confirmed that this mean pixel value matches with our calculated mean pixel value in next line. You can see mean pixel value for the scaled dataset is close to zero.
3. Pixel Standardization: Standardization of images is achieved by subtracting the mean pixel value and dividing the result by the standard deviation of the pixel values. The mean and standard deviation statistics can be calculated on the training dataset.

In above output cell, you can see in the first line- the mean and standard deviation of pixel values in both datasets. The data generator is then configured for feature-wise standardization and the statistics are calculated on the training dataset, which is matching what we would expect when the statistics are calculated manually. The test is then repeated on the entire training dataset and we can confirm that the mean is very small value close to 0.0 and the standard deviation is a value very close to 1.0.
That is enough learning for today. After reading this post I recommend you to run above code examples in your notebook and understand each line. After this you can repeat the same techniques with any color image dataset. Working on a color dataset will teach you how to modify data scaling techniques. If you follow what I suggest then believe me you will become computer vision Ninja at the end of coming posts. In the next post we will learn the standard way to lay out our image data and image augmentation for modeling. Till then Go chase your dreams, have an awesome day, make every second count and see you later in my next post.
ReplyDeleteVery Good Information...
Data science Course in Mumbai
Thank You Very Much For Sharing These Nice Tips..and more information pls Click..
thanks for sharing this information.
ReplyDeletetechitop
animeultima
dutafilm
gc invoker utility
fullhdfilmizlesene