
Another post starts with you beautiful people!
It is quite a wonderful moment for me that many Aspiring Data Scientists like you have connected with me through my facebook page and have started their focused journey to be a Data Scientists by following my book. If you have not then I recommend to atleast visit my last post here.
In two of my previous posts we have learnt about keras and colab. In this post I am going to share with you all that TensorFlow 2.0 has been released and one quite interesting news about this release is that our beloved deep learning library keras is in built with it. Yes! You heard it right. If you know keras then using TensorFlow 2.0 library is quite easy for you. One of the interesting benefit of using TensorFlow library is it's visualization tool known as TensorBoard. In this post we are going to learn how to use TensorFlow 2.0 with MNIST dataset and then setup TensorBoard with Google Colaboratory.
Let's start this post learning by opening a new notebook in Google Colab and install TensorFlow 2.0 library as below-

This will take a minute and will install the TensorFlow 2.0 library in your notebook. After installing the library we can import this as below-

Next, we will load the MNIST dataset from tensorflow keras library then split the dataset as training and test dataset and then we will normalize it like below-

Now we will visualize the performance of our model in TensorBoard. For this first we will use keras.callbacks.TensorBoard function like below-

Here see the parameters we are passing in TensorBoard function./log folder is the location where tensorflow will create logs and other parameters are boolean flags with true values which allow us to visualize different types of properties in TensorBoard.
Next, we will define our sequential keras model and then compile it like below-

After compiling the model we will train and evaluate our model like below-
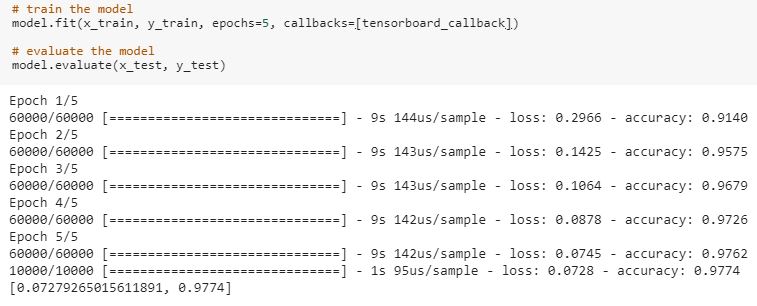
Our model has accuracy of 98%. Since TensorBoard runs on a server, we will learn the tricky part- how to access a localhost server from our colab notebook? For this purpose we will use ngrok. ngrok is a cross-platform application that enables developers to expose a local development server to the Internet with minimal effort. We will download ngrok like below-

After downloading and installing ngrok in colab, we will fire up Tensorboard using ngrok like below-

Now we will start the server with ngrok like below-

Once your server is up, it will display the url like in above output cell. Copy this url and access it in a browser. You will see your TensorBoard page like below-

See the beautiful histograms showing in your board. Now explore it more by clicking on different tabs. Here I am seeing distributions and screen is like below-

If you click on the first tab- Scalars, you will see the performance of our model like below-

You can also get whole code as a notebook from this link.
That's it! with above steps you are able to setup TensorBoard with TensorFlow 2.0 in your colab notebook. We can use TensorBoard to visualize our TensorFlow graph, plot quantitative metrics about the execution of our graph, and show additional data like images that pass through it. This visualization tool is very flexible and useful so don't wait and explore as much as you can. Till then Go chase your dreams, have an awesome day, make every second count and see you later in my next post.
That's it! with above steps you are able to setup TensorBoard with TensorFlow 2.0 in your colab notebook. We can use TensorBoard to visualize our TensorFlow graph, plot quantitative metrics about the execution of our graph, and show additional data like images that pass through it. This visualization tool is very flexible and useful so don't wait and explore as much as you can. Till then Go chase your dreams, have an awesome day, make every second count and see you later in my next post.
It was really a nice article and i was really impressed by reading this, Thanks for sharing this information. Career3s provides Python training with real time experts. please go through our website once python Training
ReplyDeleteAwesome post. You Post is very informative. Thanks for Sharing.
ReplyDeleteData Science course in Noida
Thank for sharing this beautiful blog on Tensor board, well explained. keep sharing more like this.
ReplyDeleteScope of data science
Very good post thank for sharing it.
ReplyDeleteData Analysis Courses in Pune
ReplyDeleteNice post,thanks for posting
Python training course in delhi
Python training course in Noida