Another post starts with you beautiful people!
Hope you have enjoyed and learnt my previous post about file importing
Today we will learn how as a Data Scientist we connect to the database step by step-
Before starting the code first you must read about the very powerful library -SQLAlchemy which we will use in our exercises and you can find the details here- SQLAlchemy documentation
How To Create a Database Engine-
Here, we're going to fire up our very first SQL engine. We'll create an engine to connect to the SQLite database 'Chinook.db'. You can find the download and installation steps of this sample database from here- download sqlite sample database
An engine is just a common interface to a database, and the information it requires to
connect to one is contained in a connection string, such as sqlite:///C:\sqlite\db\chinook.db .Here, sqlite is the database driver, while chinook.db is a SQLite db file contained in the local directory.
A little bit of background on the Chinook database: the Chinook database contains information about a semi-fictional digital media store in which media data is real and customer, employee and sales data has been manually created.
We can see the database structure through sqlite3 tool and it looks like as below-

Now let's create a engine and see what tables it contains-

Output-

Now, it's time for liftoff! In this exercise, we'll perform the Hello World of SQL queries-
SELECT, in order to retrieve all columns of the table employees in the Chinook database.

Run the above query in your notebook and find what Employees table has !
Customizing the Hello World of SQL Queries-
Congratulations on executing your first SQL query! Now we're going to figure out how to customize your query in order to:
Select specified columns from a table;
Select a specified number of rows;
Import column names from the database table.

Output-

Filtering our database records using SQL's WHERE-
We can now execute a basic SQL query to select records from any table in our database and we can also perform simple query customizations to select particular columns and numbers of rows.
We can filter any SELECT statement by any condition using a WHERE clause. This is called filtering our records.

Output-

Ordering our SQL records with ORDER BY-
We can also order our SQL query results. For example, if you wanted to get all records from the Employees table of the Chinook database and order them in increasing order by the column BirthDate.

Pandas and The Hello World of SQL Queries-
Here, we'll take advantage of the power of pandas to write the results of our SQL query to a DataFrame in one swift line of Python code!

Output-

Pandas for more complex querying-
Here, we'll become more familiar with the pandas function read_sql_query() by using it to execute a more complex query:
a SELECT statement followed by both a WHERE clause AND an ORDER BY clause.
We'll build a DataFrame that contains the rows of the Employee table for which the EmployeeId is greater than or equal to 6 and we'll order these entries by BirthDate.

Output-

Relationships between tables: INNER JOIN
Here, we'll perform our first INNER JOIN!
For each record in the Albums table, we'll extract the Title along with the Name of the Artist. The latter will come from the Artist table and so we will need to INNER JOIN these two tables on the ArtistID column of both.

Output-

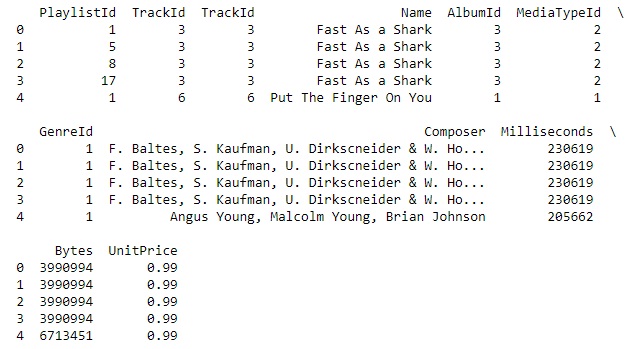
Filtering our INNER JOIN-
Congrats on performing your first INNER JOIN! You're now going to finish this chapter with one final exercise in which you perform an INNER JOIN and filter the result using a WHERE clause.

Output-

Try the above examples in your notebook and explore other databases also!
In the next post we will learn CRUD operations in relational database.
Hope you have enjoyed and learnt my previous post about file importing
Today we will learn how as a Data Scientist we connect to the database step by step-
Before starting the code first you must read about the very powerful library -SQLAlchemy which we will use in our exercises and you can find the details here- SQLAlchemy documentation
How To Create a Database Engine-
Here, we're going to fire up our very first SQL engine. We'll create an engine to connect to the SQLite database 'Chinook.db'. You can find the download and installation steps of this sample database from here- download sqlite sample database
An engine is just a common interface to a database, and the information it requires to
connect to one is contained in a connection string, such as sqlite:///C:\sqlite\db\chinook.db .Here, sqlite is the database driver, while chinook.db is a SQLite db file contained in the local directory.
A little bit of background on the Chinook database: the Chinook database contains information about a semi-fictional digital media store in which media data is real and customer, employee and sales data has been manually created.
We can see the database structure through sqlite3 tool and it looks like as below-

Now let's create a engine and see what tables it contains-

Output-
Now, it's time for liftoff! In this exercise, we'll perform the Hello World of SQL queries-
SELECT, in order to retrieve all columns of the table employees in the Chinook database.

Run the above query in your notebook and find what Employees table has !
Customizing the Hello World of SQL Queries-
Congratulations on executing your first SQL query! Now we're going to figure out how to customize your query in order to:
Select specified columns from a table;
Select a specified number of rows;
Import column names from the database table.

Output-
Filtering our database records using SQL's WHERE-
We can now execute a basic SQL query to select records from any table in our database and we can also perform simple query customizations to select particular columns and numbers of rows.
We can filter any SELECT statement by any condition using a WHERE clause. This is called filtering our records.

Output-

Ordering our SQL records with ORDER BY-
We can also order our SQL query results. For example, if you wanted to get all records from the Employees table of the Chinook database and order them in increasing order by the column BirthDate.

Pandas and The Hello World of SQL Queries-
Here, we'll take advantage of the power of pandas to write the results of our SQL query to a DataFrame in one swift line of Python code!

Output-

Pandas for more complex querying-
Here, we'll become more familiar with the pandas function read_sql_query() by using it to execute a more complex query:
a SELECT statement followed by both a WHERE clause AND an ORDER BY clause.
We'll build a DataFrame that contains the rows of the Employee table for which the EmployeeId is greater than or equal to 6 and we'll order these entries by BirthDate.

Output-

Relationships between tables: INNER JOIN
Here, we'll perform our first INNER JOIN!
For each record in the Albums table, we'll extract the Title along with the Name of the Artist. The latter will come from the Artist table and so we will need to INNER JOIN these two tables on the ArtistID column of both.
Output-

Filtering our INNER JOIN-
Congrats on performing your first INNER JOIN! You're now going to finish this chapter with one final exercise in which you perform an INNER JOIN and filter the result using a WHERE clause.
Output-
Try the above examples in your notebook and explore other databases also!
In the next post we will learn CRUD operations in relational database.
This comment has been removed by a blog administrator.
ReplyDelete